
Improve Audiobook Quality: Tips for Listeners and Narrators
How well an audiobook sounds is decided in two places. The first is the recording: the room, the microphone and careful post-production. The second is playback: player, device and headphones. As a listener, you can get more clarity with a few settings. As an author or narrator, you achieve the most by recording cleanly and then editing in the right order. A higher bitrate or a one‑click AI filter often delivers less than hoped. We show what actually works, with concrete values from audio engineering.
In short
- Listeners: Check the volume on your device and headphones, temporarily disable system sound effects and adjust the playback speed. This often improves intelligibility more than any app.
- Bitrate: For a single speaking voice most people notice no difference to lossless audio from about 128 kbps. Upsampling does not bring back lost details.
- Recording: A dry room, a cardioid microphone and a consistent distance solve most problems before they occur.
- Post-production: First remove unwanted noise, then shape with EQ, then compress and limit. Better two gentle steps than one harsh one.
- Limits: Constant noise, hum and clicks can be well repaired; clipping and room reverb only partially.
Table of Contents
- What “better quality” actually means for an audiobook
- As a listener: How to make any audiobook sound clearer
- Does a higher bitrate help?
- As a narrator: Quality is created during recording
- Post-production in the right order
- What makes a voice sound unnatural
- Free tools and what they can do
- How we handle audiobook quality at OutaStory
- Frequently Asked Questions
- Sources
What “better quality” actually means for an audiobook
With music many immediately talk about bitrate and frequency range. For an audiobook something else matters: you want to understand every word without constantly adjusting the volume, and the voice should sound natural, close and pleasant even after three hours. Good audiobook quality therefore mainly means:
- Intelligibility: Consonants are clear; nothing mumbles or blurs.
- Consistency: Quiet and loud passages are close to each other; chapters sound the same.
- Quietness: No noise, hum, mouth sounds or clicks distract.
- Dryness: You hear the voice, not the living room where it was recorded.
- Naturalness: No tinny artifacts, no “underwater” sound, no squashed tone.
Not every problem can be fixed afterwards. Microphone maker Røde describes in its guide, which sound problems can be fixed in post: constant, even noises can often be handled with equalizer and noise reduction, whereas clipped material can at best be partially rescued. The following overview summarizes what you can expect.
| Problem | Typical cause | Fixable afterwards? |
|---|---|---|
| Constant background noise | Preamp, fan, refrigerator | usually well |
| Hum | Interference from mains, in Europe at 50 Hz | usually well |
| Mouth clicks, lip smacks | dry mouth, proximity to mic | well, with finesse |
| Clipping (overdrive) | Recording level too high | only partially |
| Room reverb | barren room, hard walls | only partially |
| Muddy sound lacking highs | Microphone, distance, heavy compression | hardly, missing details can't be regained |
The conclusion is simple: restoration removes what does not belong in the recording. It doesn't invent what was never recorded.
As a listener: How to make any audiobook sound clearer
If you listen to a finished audiobook and the voice is hard to understand, it's not always due to the production. Often device, headphones and environment play a role. These steps help, in this order:
- Check all volume controls. Player, operating system, Bluetooth headphones and possibly hearing aids each have their own controls. An app cannot arbitrarily make a quietly produced recording louder, but a headphone set to a very low level will hold back any recording.
- Temporarily disable system sound effects. Many smartphones and speakers have “Surround”, “Bass” or “Room” modes. Designed for music, they often blur speech. Turn them off and compare.
- Use a speech equalizer if available. A slight boost in the presence range makes consonants clearer. More on frequencies further below.
- Adjust the playback speed. Faster is not automatically less intelligible; too slow also tires. How to find your speed is explained in our post on adjusting audiobook tempo.
- Use closed-back headphones or noise cancellation. On trains or in cars ambient noise swallows especially quiet sentence endings. Reducing that noise means you don't have to turn the volume up as much.
- Check the streaming connection. If the signal drops, some services reduce quality. When a download is worth it and when streaming is enough is shown in our comparison MP3 or streaming.
A tip many underestimate: follow along in the text. If you track text and voice simultaneously, you understand a difficult passage or an unfamiliar name immediately. At OutaStory we introduced synchronized reading and gapless playback for this, which we present in the post Audio comes of age.
Does a higher bitrate help?
Short answer: hardly for speech. One of the most common forum questions is how to “increase” the kbps of a file. Technically you can, but the sound does not improve. Once a file has been encoded at 64 kbps, the omitted details are gone. Converting to 320 kbps stores the same sound in a larger file.
Looking at research is instructive. A literature review on MP3 bitrates concludes that most people with typical equipment hear no difference between a 128 kbps MP3 and uncompressed audio. For trained ears and high-end gear the threshold is around 256 kbps. These results refer to music, which is much harder to encode than a single voice. For an audiobook bitrate is therefore rarely the bottleneck, as long as it is not set very low.
For narrators this means: export in a common format with a solid bitrate and invest your time better in the room and editing. That's where the audible difference is made.
As a narrator: Quality is created during recording
Every sound engineer tells you the same: record well instead of trying to fix everything later. Røde sums it up with an image: you can only stick a limited number of plasters on a wound. For your home studio this means four things.
The room
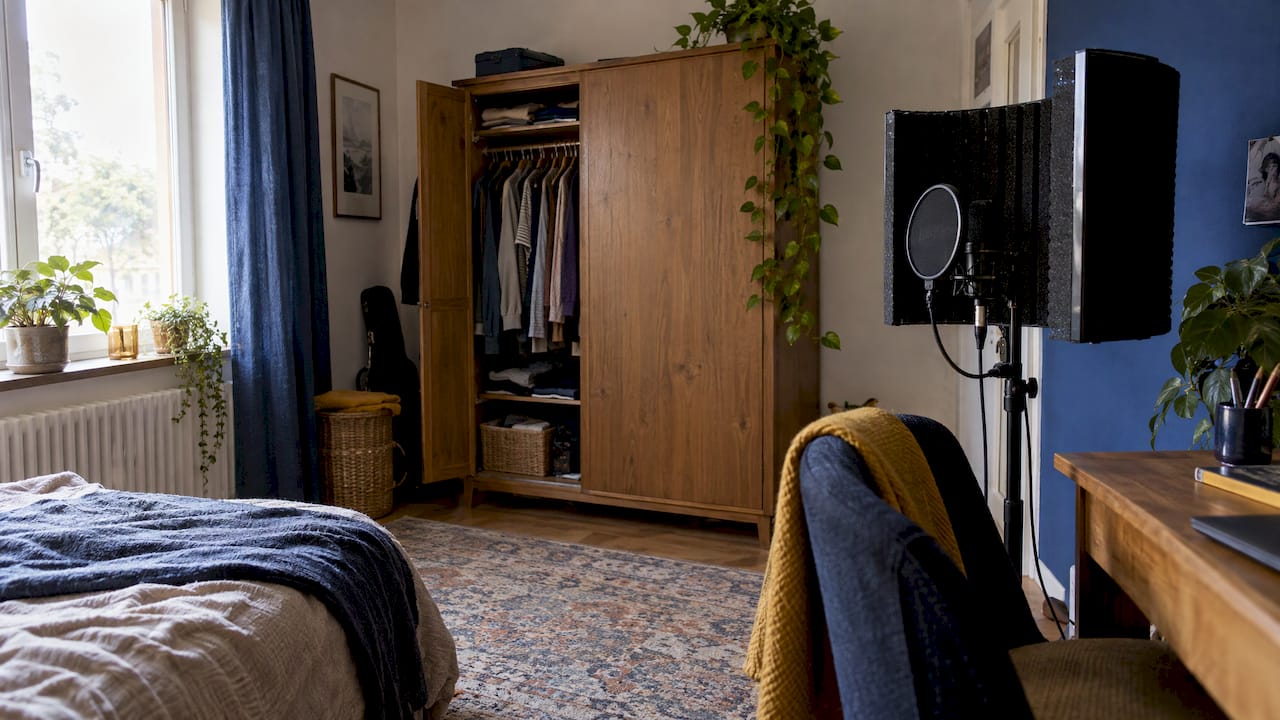
The most important factor is not the microphone but the room. A bare room with hard walls reflects the voice back, and that reverb can only be removed partially later. Bonedo recommends in its home recording speech tutorial a as dry, reflection‑poor room as possible. If you don't want to line a small room with absorbers for 200 to 300 euros, use a reflection filter, a semicircular shield with acoustic foam behind the microphone.
Practically helpful are items already in the house: a full wardrobe, curtains, a rug, cushions. Test your room by clapping your hands. If it rings, record elsewhere.
Microphone and distance
A condenser microphone with a cardioid pattern mainly picks up what happens right in front of it and rejects more of the room. Equally important is a consistent distance. If you lean back or turn your head to the script, volume and tone change from sentence to sentence. Mark your seating position and fix the script so you don't have to turn away.
The Lazi Academy on noise reduction adds: record close to the source, use an interface with a good preamp and use balanced XLR connections instead of unbalanced jack. That keeps the noise floor low before any filter is needed.
Level with headroom
Record a bit too quietly rather than too loudly. A quiet, clean signal can be raised without loss; an overdriven peak stays damaged. Set the input level so that even your loudest exclamation keeps a clear distance to the red mark.
Stop hum at the source
A low, steady hum usually comes from the mains: in Europe at 50 Hz and its harmonics. Causes are poor grounding, ground loops or damaged cables, according to Lazi Academy. Before filtering, swap cables, plug devices into the same power strip or use a DI box with ground lift.
If you're recording your voice for a story for the first time, our help section has a guide on how to record your narration voice and upload it.
Post-production in the right order
The order of processing steps is not a detail. A compressor placed before noise reduction raises the noise in quiet passages. This chain has proven effective:
- Listen and choose a reference. Listen to excerpts of a well-produced audiobook beforehand and use them as a comparison while working. That way you know where you want to go.
- Clean up. Remove constant noise, eliminate mouth clicks and smacks, reduce loud breaths (don't remove them completely or the voice will sound breathless and artificial).
- Apply a low cut. A high-pass filter below about 60 to 100 Hz removes handling noise, rumble and remaining hum that rarely occur in the speaking voice.
- Shape with EQ. Slightly reduce problem areas, gently boost presence.
- Compress. The compressor evens out loud and quiet parts so you don't have to keep adjusting the volume while listening.
- Limit. A limiter at the end catches the last peaks.
- Check listening. On headphones, in the car and on a phone speaker. If it sounds good everywhere, it's done.
For settings in steps 3 to 6 technical articles give clear starting points. The values come from the guides on keyboards.de for mixing a narrator's voice and for the compressor for a natural voice.
| Tool | Starting value | Purpose |
|---|---|---|
| High-pass (Low Cut) | below about 60 to 100 Hz | remove rumble and hum |
| Presence EQ | subtle boost between 2 and 5 kHz | make consonants clearer |
| Compressor: Ratio | 2.5:1 to 3:1 | even out level without squashing |
| Compressor: Attack | 15 to 25 ms | keep syllable attacks lively |
| Compressor: Release | 80 to 120 ms | natural decay |
| Gain Reduction | usually 3 to 6 dB in loud passages | audibly even, not pressed |
| Limiter: Ceiling | about -1 dBFS, never 0 dB | avoid clipping on export |
Consider these numbers a starting point, not a recipe. Every voice is different: a deep male voice often needs a slightly lower low cut than a high female voice, a nasal narrator benefits more from a cut than a boost.
What makes a voice sound unnatural
The most common mistake in post-production is not too little but too much. Know these warning signs:
- Tinny or “underwater”: Noise reduction was too aggressive. Lazi Academy describes that an aggressive noise profile produces metallic, gurgling artifacts. Reduce the amount and work in two gentle passes instead.
- Harsh and tiring: The presence range between 2 and 5 kHz was boosted too much. The ear is especially sensitive here and tires quickly, especially during long chapters.
- Squashed and lifeless: The compressor is working too hard. If gain reduction is consistently far above the table values, the voice loses its dynamics.
- Washed-out consonants: A de-clicker over the whole file smooths out plosives too. Edit only the affected spots.
- Pumping: The noise floor becomes noticeably louder during pauses and then drops again. Usually the compressor is placed before noise reduction, or the release is too short.
A simple check: turn all effects off for a moment and compare at the same loudness. If the edited version sounds clearer and still like the same person, you're on the right track.
Free tools and what they can do
You don't need expensive software to get started. The free audio editor Audacity includes noise reduction, equalizer, compressor and limiter and is sufficient for a clean edit of a speech recording. Its noise reduction works with a noise profile: you mark a few seconds of pure silence, the program learns from it and subtracts that pattern from the recording. This works well for constant noise, less so for changing sounds like street noise or a barking dog.
From this follows a practical tip for every recording: record a few seconds of room tone at the beginning and end without speaking. That silence is your noise profile and also helps when cutting later.
AI-based audio enhancers that often appear at the top of search results promise studio sound with one click. They can noticeably improve a noisy recording but sometimes change the voice's timbre or create artifacts that tire the listener over the course of an entire audiobook. If you use them, apply the same rule as for any filter: set them gently, compare before and after, don't trust them blindly.
Room reverb remains the hardest issue. Specialized de-reverb plugins can reduce it, but reliable free solutions are rare. That's why every euro and every minute you invest beforehand in the room pays off.
How we handle audiobook quality at OutaStory
At OutaStory every short story can not only be read but also played as an audiobook. For this we use professionally produced voices or the author’s own voice. For readers this means: you don't have to worry about bitrates and filters, you can just start a story—on the go or to fall asleep—with genres from fantasy and science fiction to crime and thrillers. Try, for example, the thriller The Double Agent.

If you want to listen more than the free access allows, OutaStory Premium offers extended features like unlimited listening and offline use. And if you record yourself: how narrators contribute with us and which platform commission of 8% applies is explained on our speakers page. How an audiobook is created with us from the narrator to the upload is shown in our post How an Audiobook Is Created. And if you're wondering whether your voice suits narration or acting with roles better, the comparison Audiobook Narrators vs. Voice Actors helps.
Your world, your stories: write, read, listen.
Frequently Asked Questions
Can I make a quiet audiobook louder?
Only to a limited extent. First check all the controls on the device, player and headphones and temporarily turn off system sound effects. Some players offer a volume boost or an equalizer, but the recording's base volume is determined by the production.
Does converting an audiobook to a higher bitrate help?
No. Converting makes the file larger but the sound stays the same, because lost details don't come back. For a speaking voice a solid bitrate is sufficient anyway; most listeners notice no difference to uncompressed audio from about 128 kbps.
Which microphone do I need for my own audiobook recording?
A condenser microphone with a cardioid pattern is a good choice for speech because it mainly picks up the voice in front of the mic. More important than the model are a dry room and a consistent distance. A reflection filter behind the microphone noticeably improves the sound in normal living rooms.
How do I get reverb out of my recording?
Only partially afterwards, with special de-reverb plugins. Much more effective is to avoid recording the reverb in the first place: speak in a small, furnished room, use curtains and blankets and stay close to the microphone.
How strong should I compress?
As a starting point for a natural speaking voice, a ratio of about 2.5:1 to 3:1 and usually 3 to 6 dB of gain reduction in loud passages are common. If the voice sounds squashed or breathless, reduce the compression.
Sources
- Røde: Which sound problems can be fixed in post
- Literature review: Diminishing returns of higher mp3 bitrates
- Bonedo: 5 steps to successful home recording speech
- Lazi Academy: Noise Reduction
- keyboards.de: How do I mix a narrator's voice?
- keyboards.de: Set your podcast compressor correctly
Recommendations
- How an audiobook is created: From choosing the narrator to uploading
- Adjusting audiobook speed: How to find your tempo
- Hire a professional to read your story
- Audiobook Narrator vs. Voice Actor: The difference explained
Read and write on OutaStory
Thousands of short stories to read for free — or publish your own and find an audience.